¶ 1. About This Manual
Welcome to the RANGE 3 (Pro) 3D scanner user manual! This manual provides operating instructions for RANGE 3 (Pro). Please read the manual before your first use to ensure that you use this scanner correctly and safely. If needed, you can click on any topic in the navigation bar to quickly jump to that section.
Manual Download
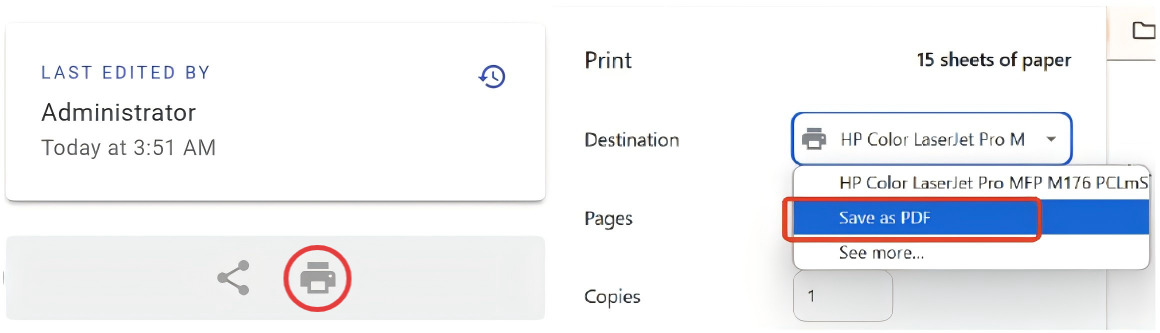
To save the current webpage as a PDF manual, scroll down to the bottom of the Contents bar, tap the printer icon, and then choose "Save as PDF" from the options presented.
¶ 1.1 Read Before Use
- This manual is specifically for the RANGE 3 (Pro) 3D scanner and provides guidance on setup, connection, scanner calibration, and initial scanning to help you use the scanner correctly and efficiently and maximize its scanning performance.
- This manual is frequently updated to cover the scanner’s latest features and improvements.
¶ 1.2 Safety Instructions
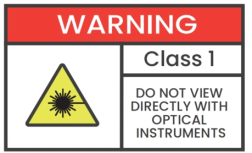
Under normal conditions of use, Class 1 laser radiation is considered safe for eyes and skin. To ensure safety, please follow the safety instructions below.
¶ 1.3 Maintenance and Operation Safety
- Please keep the scanner away from water or other liquids, and avoid dropping or bashing it.
- This product's operating environment temperature range is 0°C to 40°C (32°F to 104°F). Please use the product only within this range.
- Do not expose the Calibration Board to liquids or stains. Avoid bending, warping, or damaging the board, as this may affect calibration accuracy.
- Do not remove, disassemble, or modify any part of the scanner. Any modifications to the product may render it non-compliant with safety standards.
- Keep the device stored in a safe location out of reach of children.
¶ 1.4 Online Resources



¶ 2. About RANGE 3 (Pro)
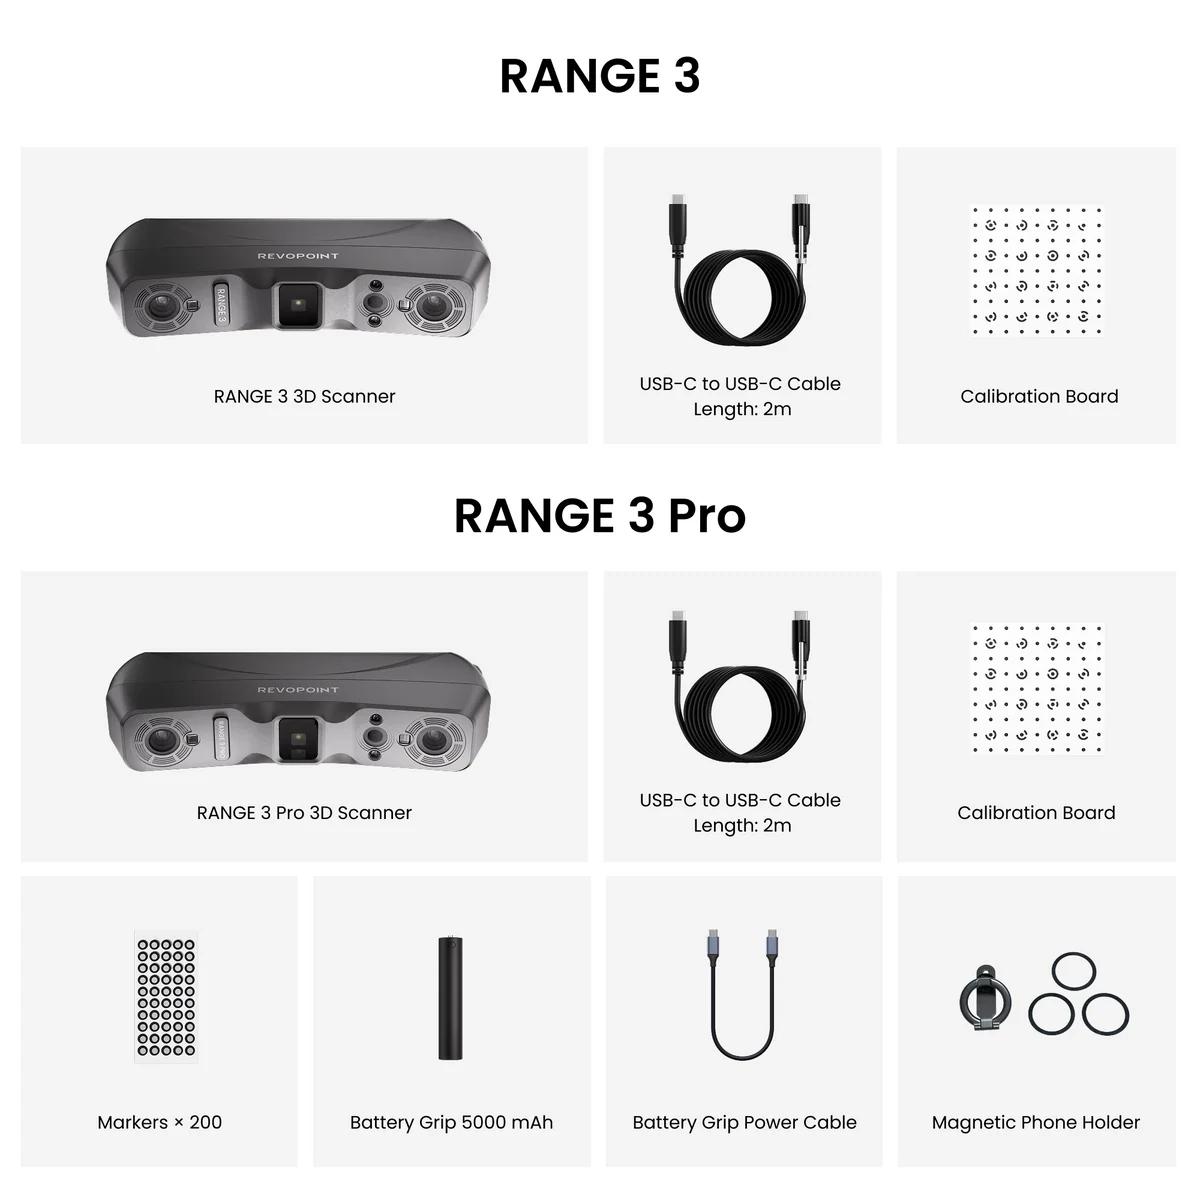
¶ 2.1 What's in the Box
Before use, check all components against the packing list to ensure completeness and good condition.
¶ 2.2 Product Profile
¶ 3. Software Download and Usage
¶ 3.1 Software Download and System Requirements
The RANGE 3 (Pro) scanner must be used with the Revo Scan 6 (Computer) or Revo Scan 6 (Mobile) software. Before use, please download and install the software.
|
Software |
Revo Scan 6 (Computer) |
Revo Scan 6 (Mobile) |
|
Download Channel |
or Mobile app store |
|
|
Software Requirements |
Minimum PC Requirements: Windows
System Version: Win 10/11 (64 bit)
RAM: ≥16 GB
CPU: Intel i7 13th Gen or AMD Ryzen 7 5800
GPU: NVIDIA GeForce RTX 3060 (8 GB)
macOS
System Version: macOS 11.0 or later
RAM: ≥16 GB
Processor: M1 Pro/Max/Ultra
Recommended PC Requirements: Windows
System Version: Win 10/11 (64 bit)
RAM: ≥32 GB
CPU: Intel i9 12th Gen or later
GPU: NVIDIA RTX 4060 (8 GB) or later
macOS
System Version: macOS 11.0 or later
RAM: ≥24 GB
Processor: M3 Pro/Max/Ultra or later
|
Mobile Requirements: Android
CPU: Snapdragon 8 Gen1, Dimensity 9000, Kirin 9000S Equivalent performance or later
RAM: ≥ 12 GB
System Version: Android 11 or later
Storage: ≥ 128 GB
iPhone
Model: Models after iPhone X
System Version: iOS 14.0 or later
RAM: > 4 GB
Storage: ≥ 64 GB
iPad
Model: 10th Gen iPad or later
|
¶ 3.2 Platform and Feature Compatibility
| Platform & System | Software Available | Laser-Line GPU Acceleration | AI Intelligent Segmentation | 3DGS |
|---|---|---|---|---|
| Windows-NVIDIA | ✓ | ✓ | ✓ | ✓ |
| Windows-AMD | ✓ | ✓ | ✓ | ✓ |
| macOS-ARM64 | ✓ | ✓ | ✓ | ✓ |
| Android | ✓ | ✕ | ✕ | ✓① |
| iOS/iPadOS | ✓ | ✕ | ✕ | ✓① |
|
Notes: ① Mobile devices capture data and transmit it to a PC for 3DGS computation. ② macOS‑x86_64 and Linux operating systems are not supported. |
||||
If you need to learn more about operating Revo Scan 6, please refer to the Revo Scan 6 Software User Manual.
¶ 4. Scanner Connection
To ensure optimal scanning results, please connect the scanner directly to your Computer and avoid using a USB hub.
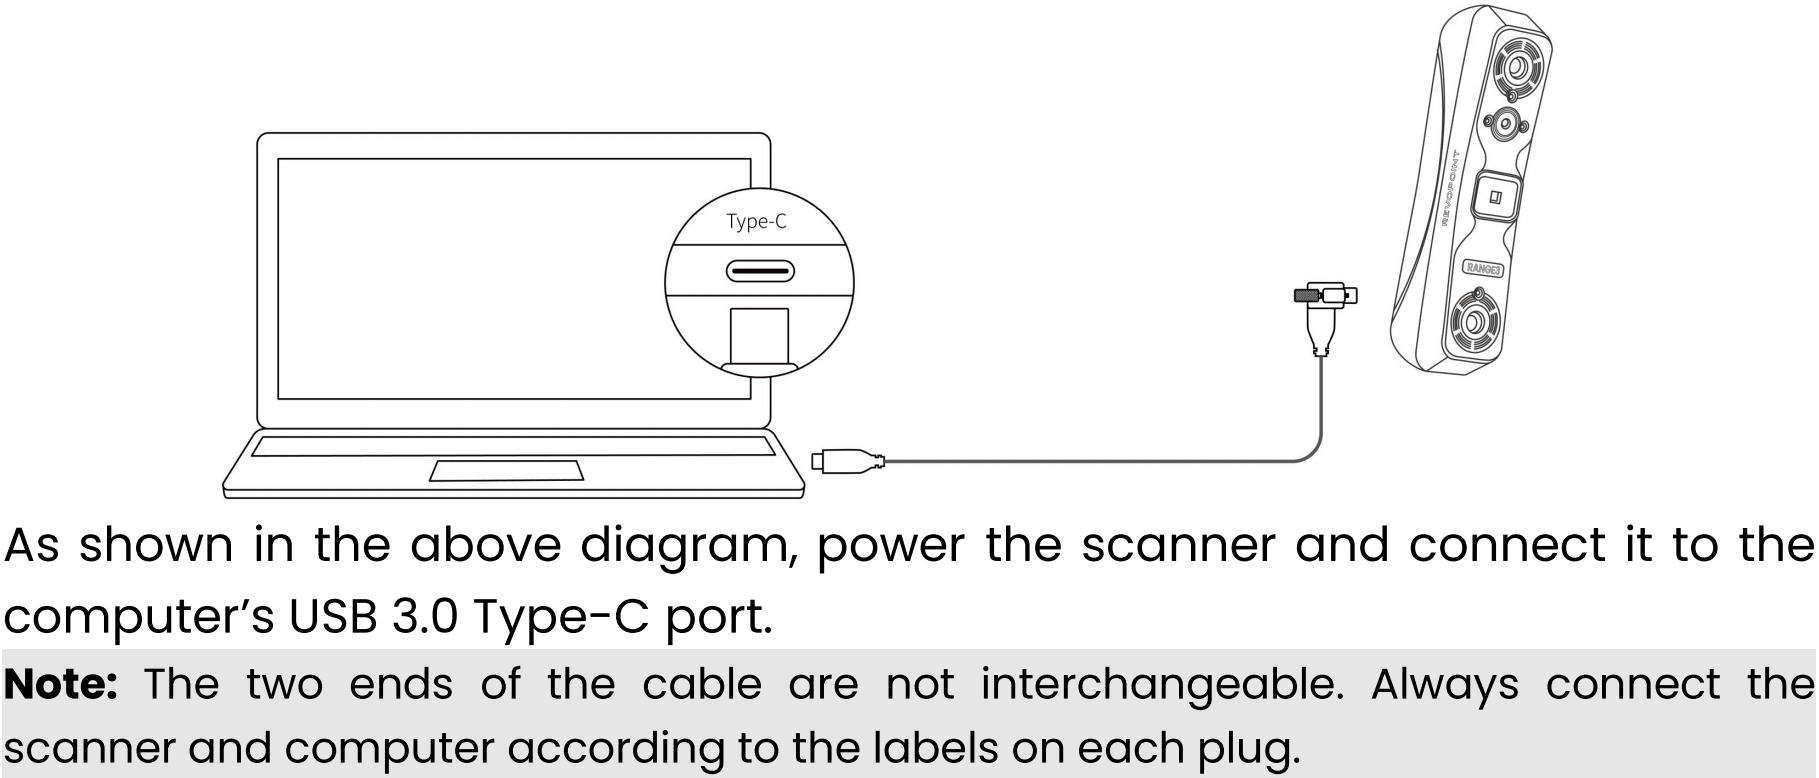
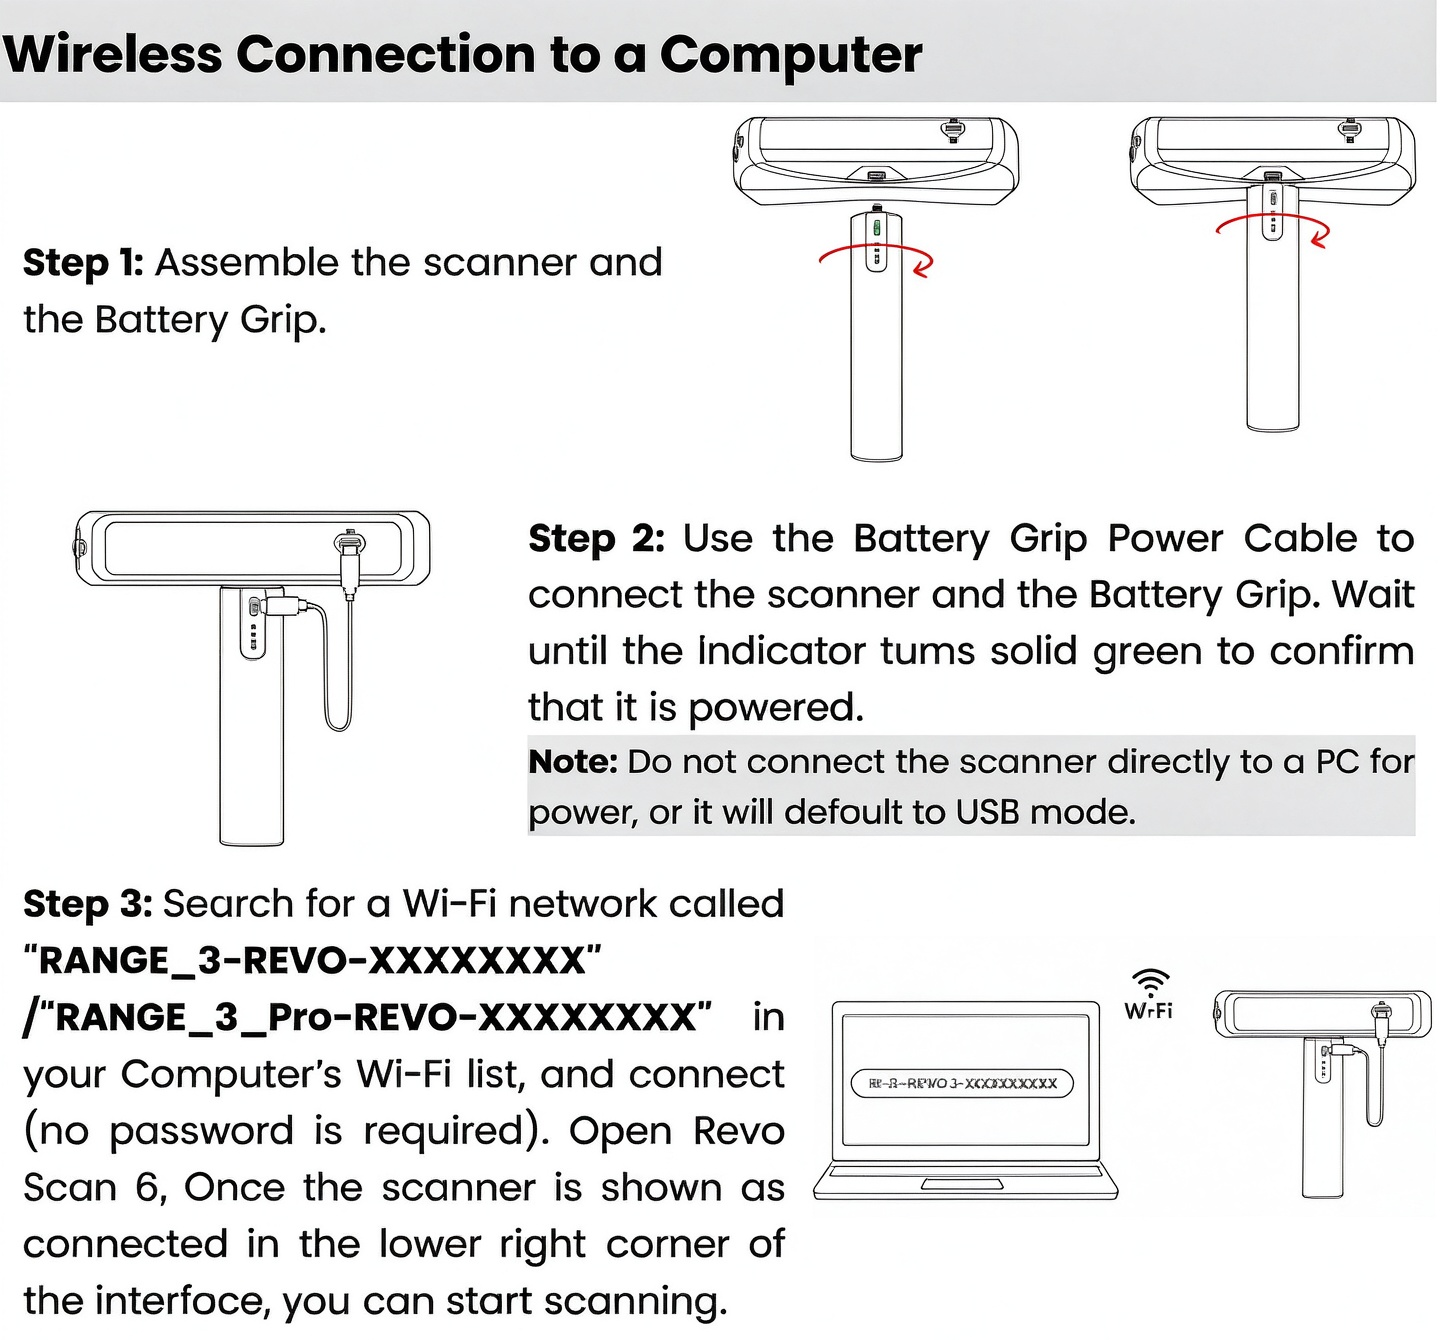
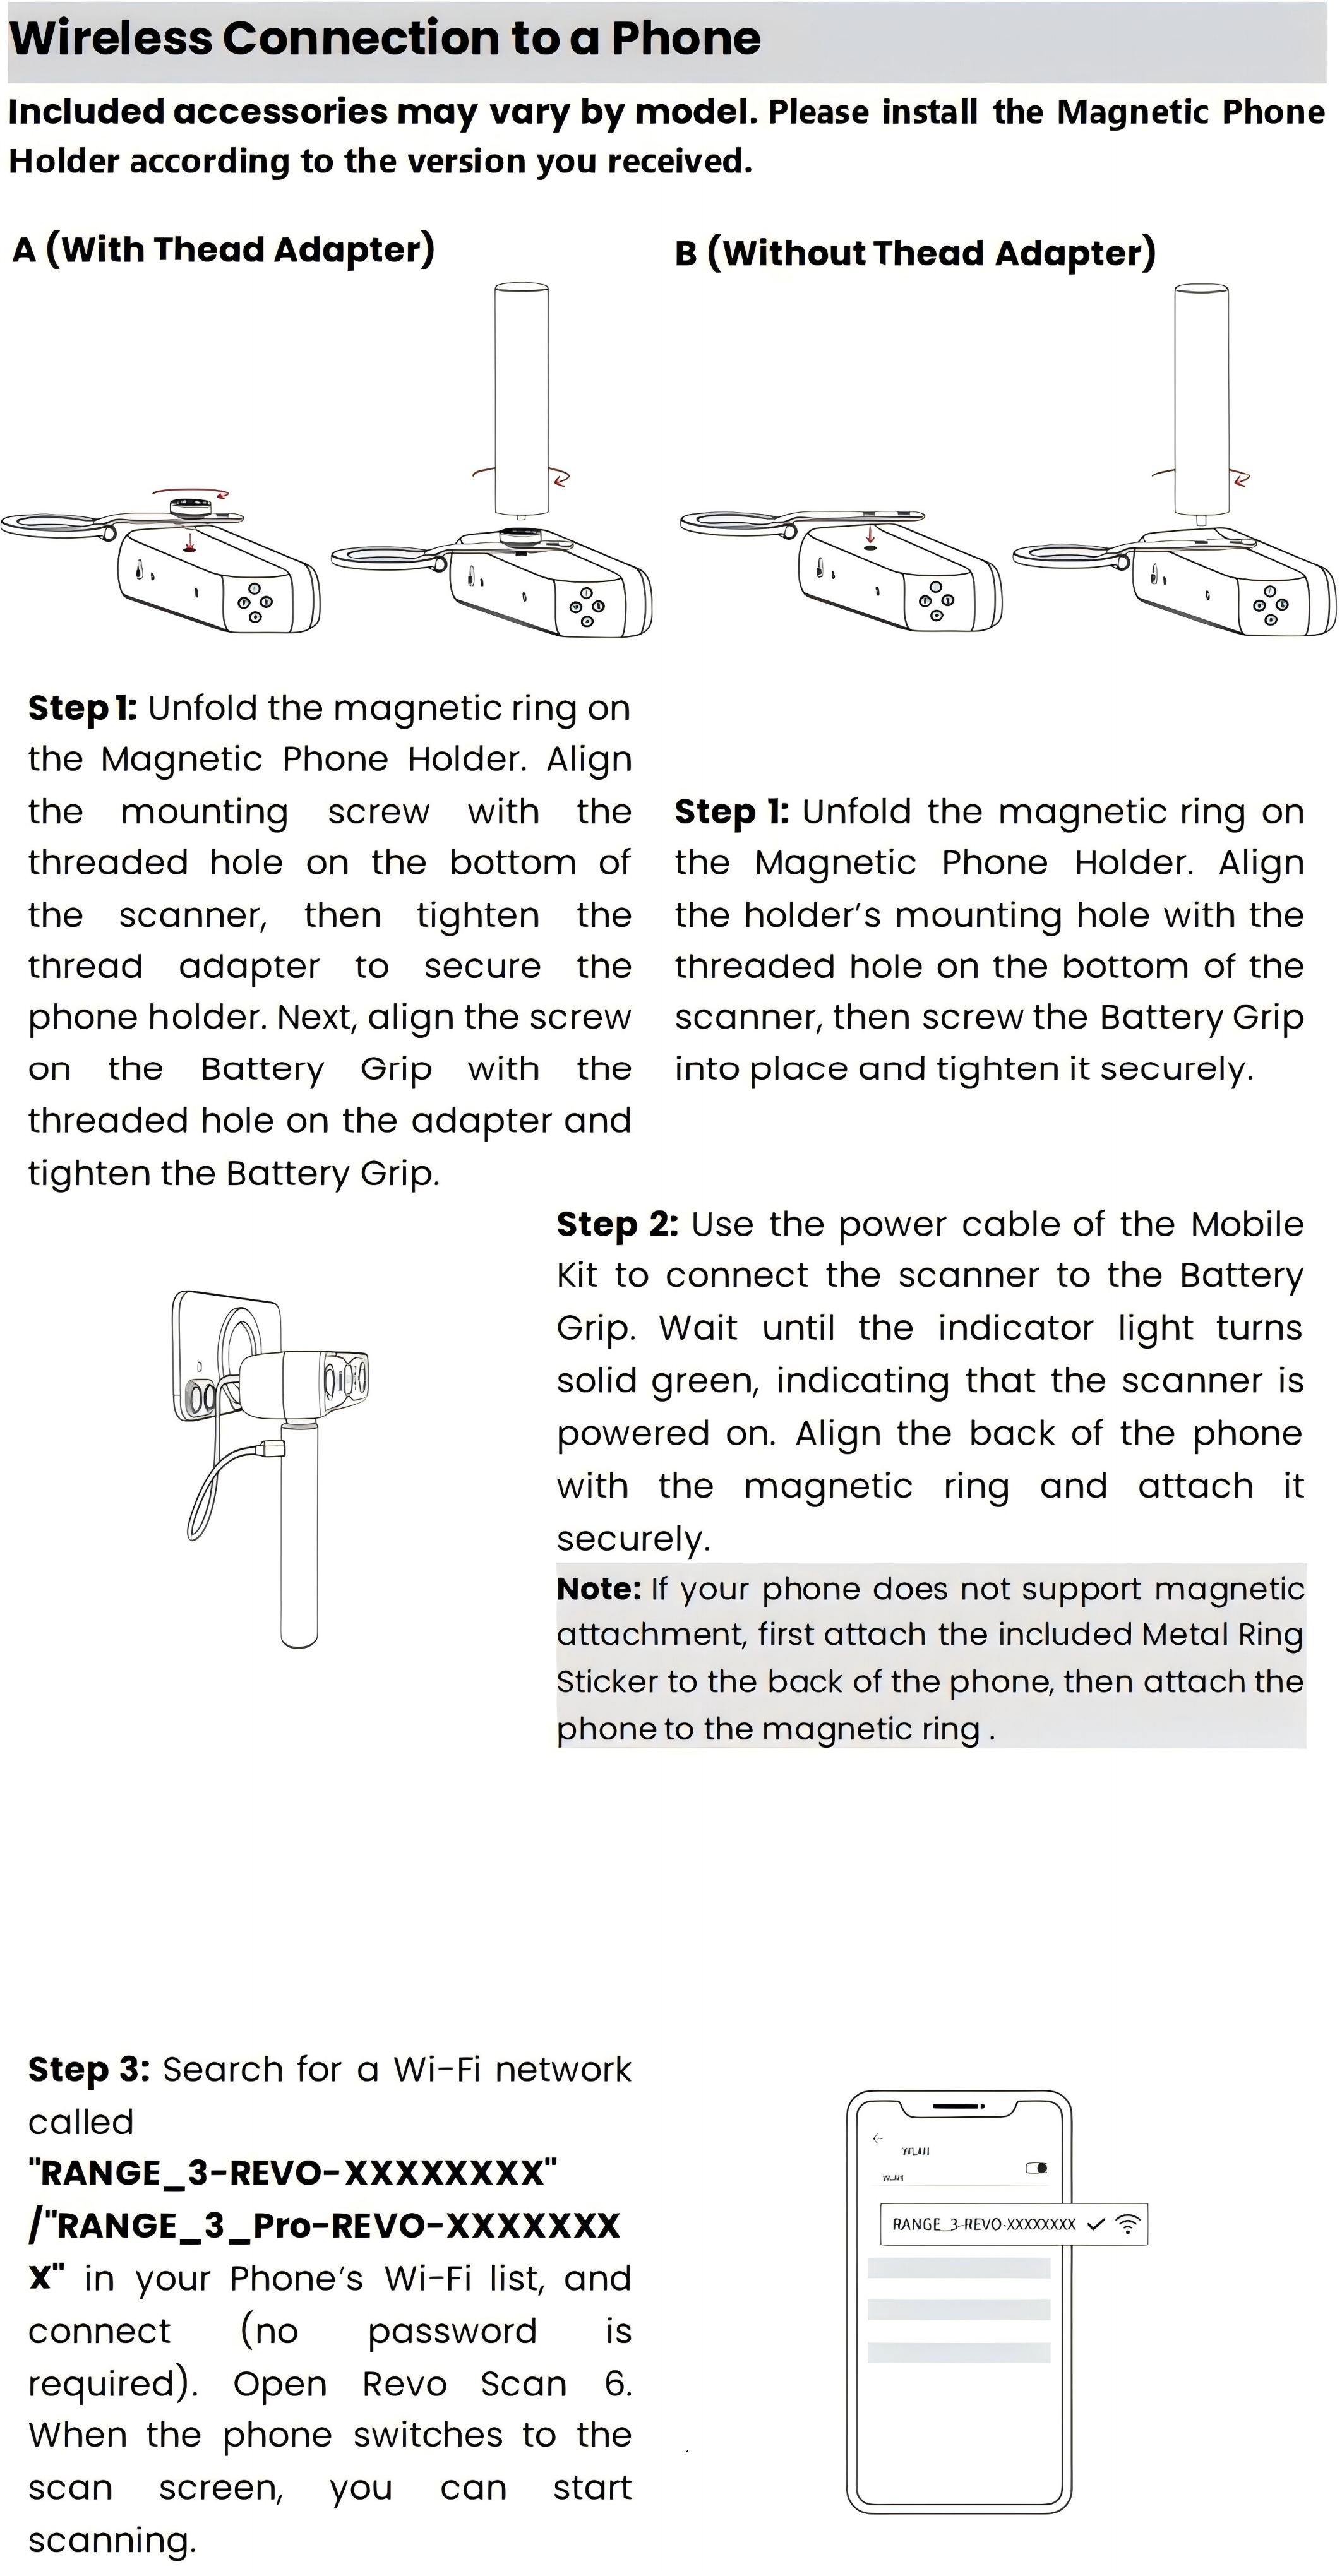
¶ 5. Scanner Calibration
Revo Scan 6 allows you to recalibrate RANGE 3 (Pro) to ensure optimal accuracy. You can first check the current accuracy using the software's calibration feature. If the results are suboptimal, follow the on-screen prompts to complete the calibration process.
¶ 5.1 Preparation Before Calibration
① Connect the scanner to the computer using a USB‑C to USB‑C cable and launch Revo Scan 6.
Note: Warm up the scanner for 10 minutes before calibration to ensure optimal accuracy.
② Place the Calibration Board and click "Calibration" at the lower‑left corner on the software homepage to start calibration.
③ Adjust ambient lighting to prevent excessively dark or bright conditions.
④ Scan the QR code on the back of the Calibration Board to import its metrological data.
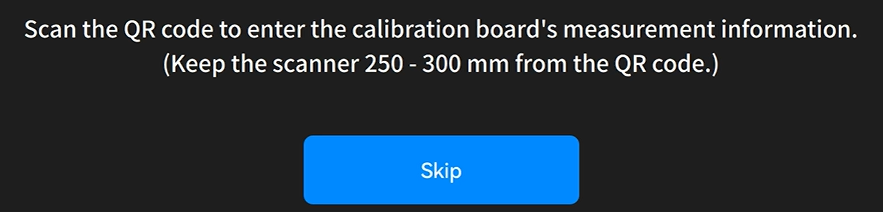
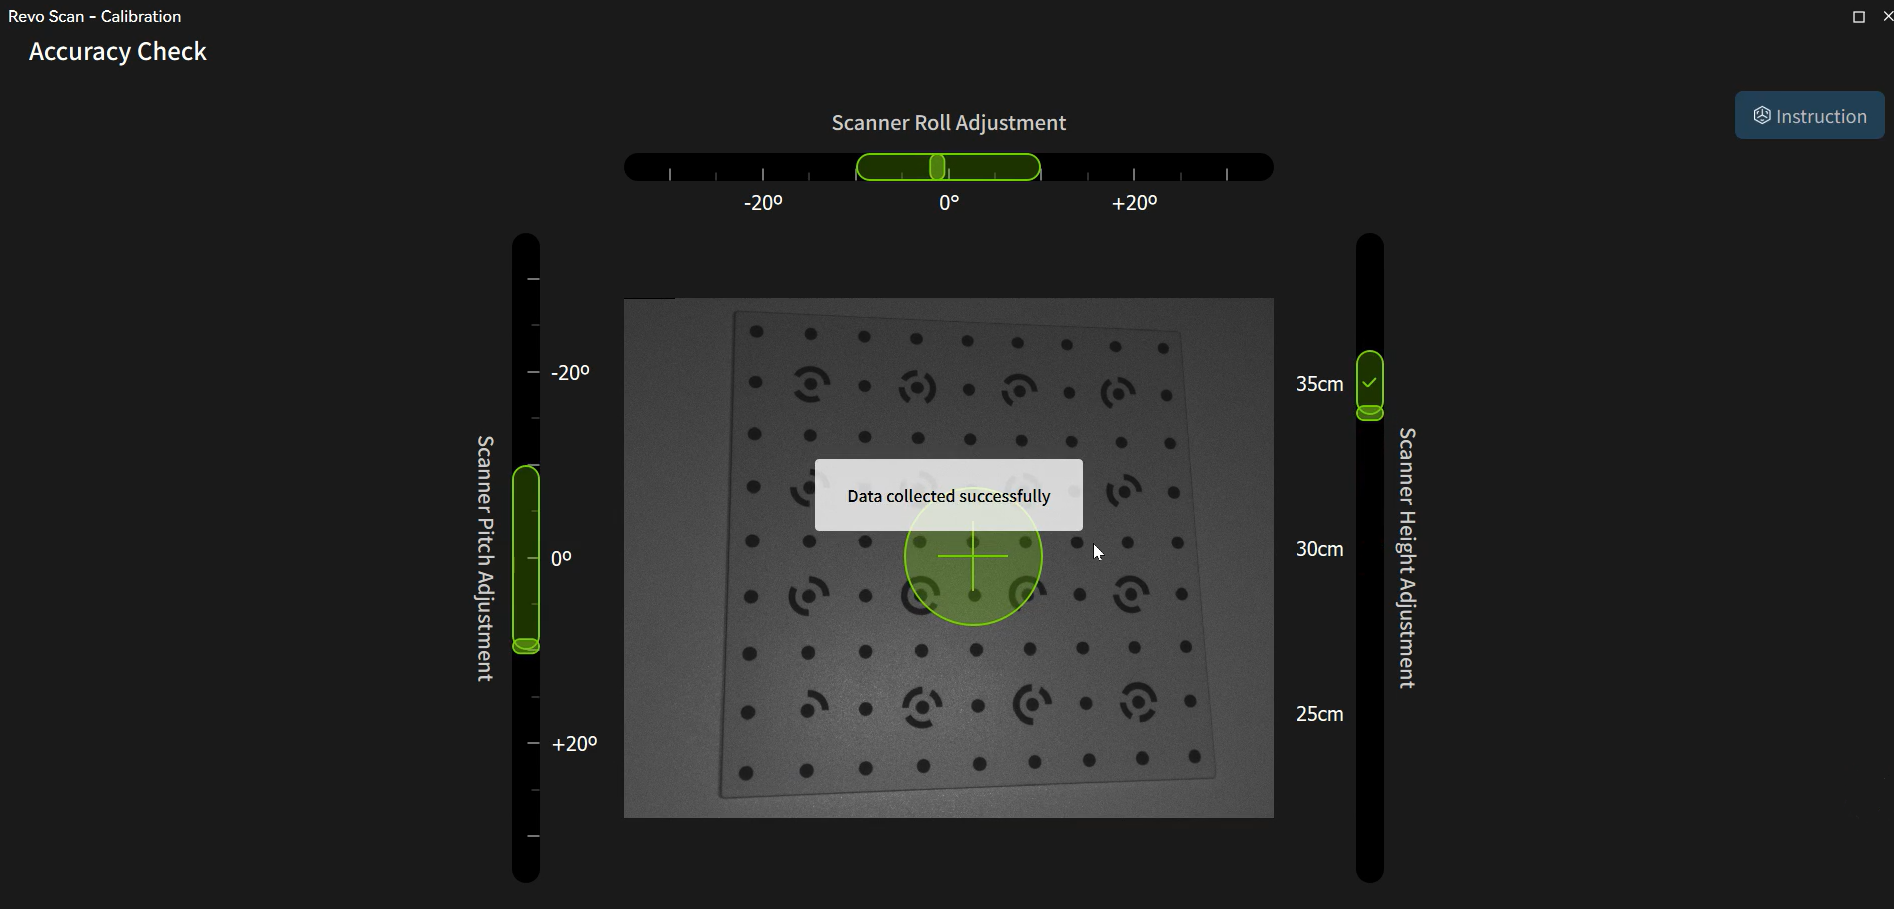
⑤ Place the Calibration Board. Follow the operation diagram to access the scanner accuracy check page, and determine whether to proceed with calibration based on the test result.
¶ 5.2 Calibration
① Adjust the camera tilt, pitch, and height based on the guide diagram until all three sliders are within the green boxes.
② Follow the top progress bar and complete data acquisition for five angles step by step: horizontal, left, right, front, and rear.
③ Save the calibration result when calibration accuracy is acceptable.
④ Click "Complete" to return to the startup page. The camera will restart automatically, and the calibration is complete.
¶ 6. Tracking Mode and Scan Mode
RANGE 3:
| Tracking Mode | Supported Scan Mode | Applications | Typical Objects |
|---|---|---|---|
 |
VCSEL Rapid | Suitable for objects with prominent and abundant surface geometric features. Registration is performed using the object’s inherent structural features. | Human bodies, heads, statues, action figures, dolls, shoes, plaster busts, decorative ornaments, etc. |
 |
VCSEL Rapid | Suitable for objects featuring obvious color textures, patterns, printed content, or natural grain. It relies on color and texture feature registration, ideal for subjects lacking prominent geometric features yet abundant in surface patterns, color variation, and text. | Painted models, printed carpet, labelled packaging boxes, book covers, wood-grain objects, stone-textured objects, products with text markings, decorative artwork, etc. |
RANGE 3 Pro:
| Tracking Mode | Supported Scan Mode | Applications | Typical Objects |
|---|---|---|---|
 |
VCSEL Rapid | Suitable for objects with prominent and abundant surface geometric features. Registration is performed using the object’s inherent structural features. | Human bodies, heads, statues, action figures, dolls, shoes, plaster busts, decorative ornaments, etc. |
 |
Laser Line | Suitable for objects with relatively flat surfaces, inconspicuous geometric features, or regular symmetrical shapes. Registration is performed by identifying markers. | Cubes, cylinders, spheres, regular box-shaped objects, flat panels, pipes, tanks, smooth casings, etc. |
 |
Laser Line | Suitable for large, featureless objects. Global markers are used to improve registration stability during large‑area scanning. | Automotive parts, large sculptures, furniture, large moulds, large enclosures, equipment housings, door panels, sheet metal parts, etc. |
 |
Laser Line and VCSEL Rapid | Suitable for objects featuring obvious color textures, patterns, printed content, or natural grain. It relies on color and texture feature registration, ideal for subjects lacking prominent geometric features yet abundant in surface patterns, color variation, and text. | Painted models, printed carpet, labelled packaging boxes, book covers, wood-grain objects, stone-textured objects, products with text markings, decorative artwork, etc. |
¶ 7. Your First Scan
¶ 7.1 VCSEL Rapid Scan
In this example, RANGE 3 is used to scan a large sculpture to introduce the operation process of the VCSEL Rapid scanning mode.
¶ 7.1.1 Start Scanning
¶ Create a New Scan
Click"New Scan" on the File page.
① Select "Feature" for the tracking mode and select "VCSEL Rapid" for the scan mode.
② Name the scan file and click "Confirm" to enter the scanning interface.
¶ Scan Settings & Scan Control
① Set Accuracy to "High Accuracy" by default, select "Dark/Black" for Object Type, and then configure Scanning Distance as needed.
② Enable Color Scanning if the color model is needed.
③ Enable Base Removal, Object Segmentation, or Remove Background as needed to reduce unnecessary object interference.
④ Check the object position in the left camera preview window to ensure the object is within the camera's field of view.
⑤ Adjust the depth camera exposure to minimize red or blue coloring on the object surface in its preview window. Gray is preferred.
⑥ Adjust the scanner‑to‑object distance to ensure the color bar on the distance histogram shows green.
⑦ After parameters are configured, click "Scan".
⑧ You can pause during scanning and view the scanning progress in real time in the object scan status pane. Click "Scan" to resume if the scan is incomplete.
¶ 7.1.2 Finish Scanning
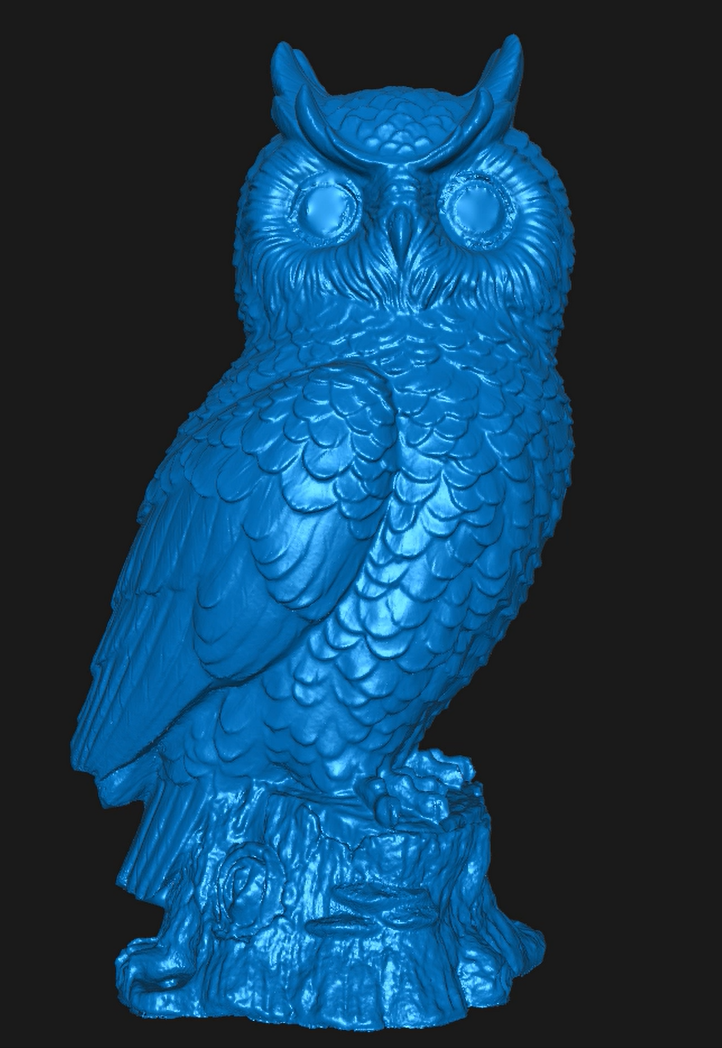
You can refer to the following criteria to determine if scanning is complete:
- Data completeness: Ensure key areas are fully captured and check for missing data on model boundaries and contours. (Small holes can be manually filled during post-processing.)
- Data registration quality: Ensure no misalignment, shifting, or other anomalies are present in the data.
- Point cloud quality: Ensure the model surface is free from excessive noise, spikes, or uneven density (over-dense or sparse regions) that could degrade model quality.
After you confirm that no such issues exist, click "Complete" to finish the scan. If the model is incomplete, click "Scan" to resume.
¶ 7.2 Laser Line Scan
Only RANGE 3 Pro supports the Laser Line scanning mode.
¶ 7.2.1 Preparation Before Scanning
¶ Handle the Object
- Set up a marker environment for scanning in Marker or Global Marker tracking mode.
Do not use too many markers and ensure that at least 5 markers are placed irregularly per scanned frame.
For optimal accuracy, attach the markers to flat surfaces rather than curved ones. Do not use cushioned pads or soft cloths with pre‑applied markers.
You can also use the Marker Block Kit to create a more ideal and complete scanning environment.
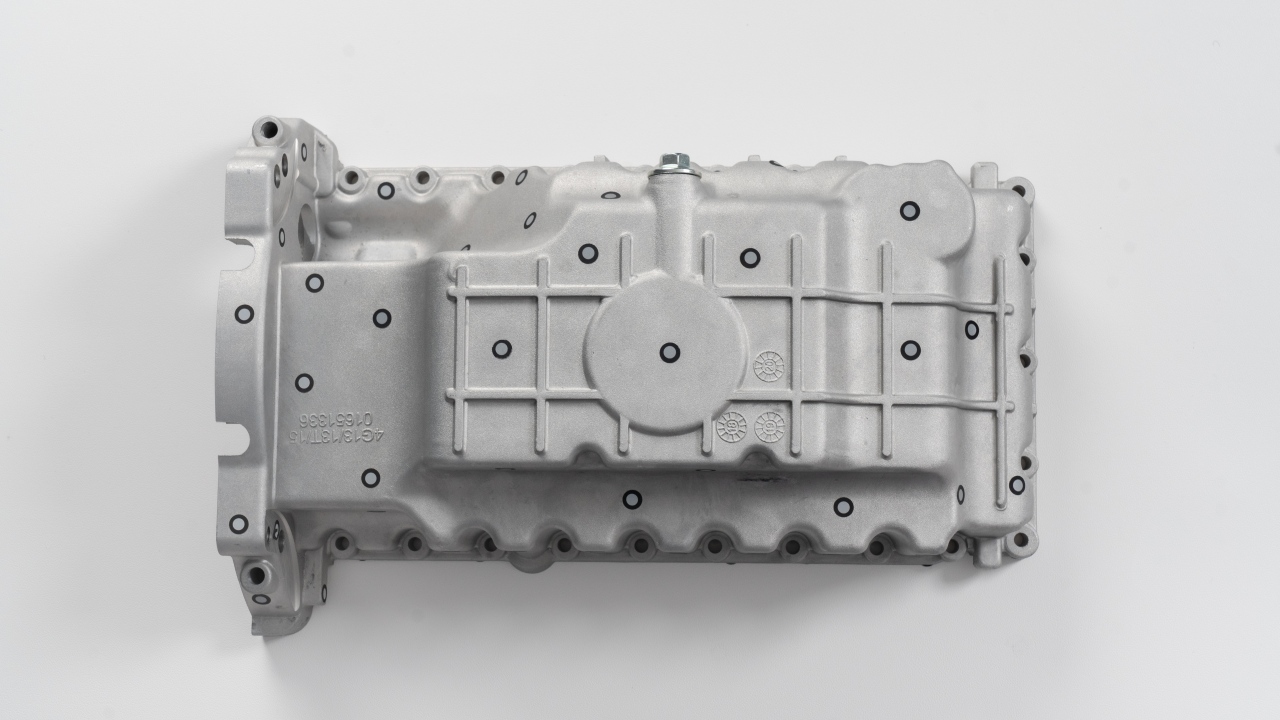
Marker Block Kit Quick Start Guide
- Use Scanning Spray
For transparent or specular objects, such as glass, stainless steel, and electroplated surfaces, both the laser line scanning and structured light scanning require scanning spray.
For dark reflective or metallic reflective surfaces, such as black paint and machined aluminum alloy, the laser line scanning can be performed without spray.
Note: Scanning spray can be purchased from Revopoint's online stores.
For detailed object processing instructions such as how to use markers, please refer to Scanning Tips--Handle Objects Before Scan.
¶ 7.2.2 Start Scanning
¶ Create a New Scan
Click "New Scan" on the File page.
① Select "Marker" or "Global Marker" for the tracking mode and select "Laser Line" for the scan mode. For more details about mode selection, please refer to Tracking Mode & Scan Mode.
② Name the scan file and click "Confirm" to enter the scanning interface.
¶ Scan Settings & Scan Control
① Enter the scan interface. Set Accuracy to "High Accuracy" and select "Metallic Shiny Object" for Object Type.
② Configure the target point distance. A larger value enables faster scanning, while a smaller value produces a finer model at a relatively lower scanning speed.
③ Adjust the exposure and laser brightness of the depth cameras to ensure that the laser lines are clearly visible in the depth camera preview window.
④ Adjust the scanner‑to‑object distance to ensure the color bar on the distance histogram shows green.
⑤ After parameters are configured, click "Scan."
⑥ You can pause during scanning and view the scanning progress in real time in the object scan status pane. Click "Scan" to resume if the scan is incomplete.
¶ 7.2.3 Finish Scanning
You can use the following criteria to determine if scanning is complete:
- Data completeness: Ensure key areas are fully captured and check for missing data on model boundaries and contours. (Small holes can be manually filled during post-processing.)
- Data registration quality: Ensure no misalignment, shifting, or other anomalies are present in the data.
- Point cloud quality: Ensure the model surface is free from excessive noise, spikes, or uneven density (over-dense or sparse regions) that could degrade model quality.
Note: In Laser Line scanning mode, the quality map gradually turns blue as more frames are rendered. A fully blue quality map indicates high-quality scan data. Therefore, we recommend that you scan the object from multiple angles and directions until the entire model surface turns completely blue.
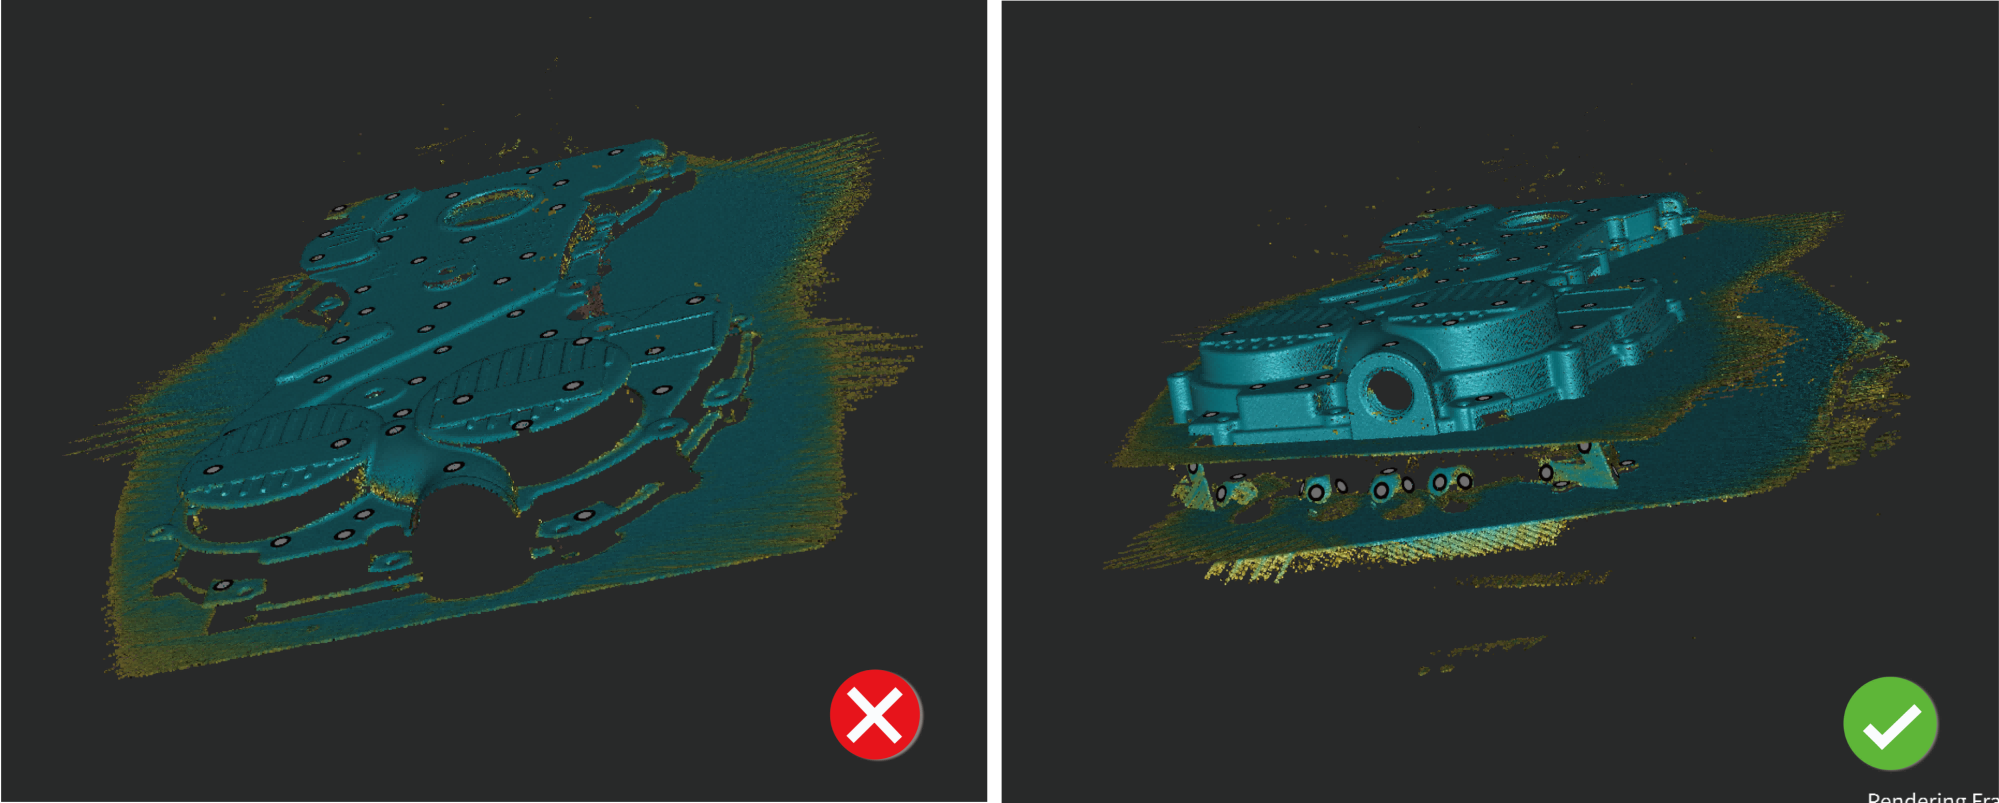
After you confirm that no such issues exist, click "Complete" to finish the scan. If the model is incomplete, click "Scan" to resume.
¶ 7.3 Outdoor Scan
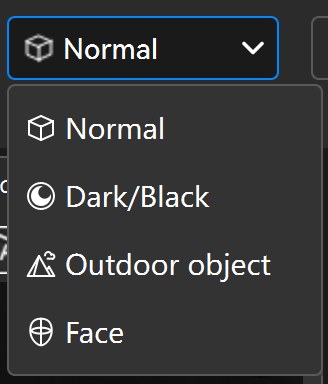
Both Laser Line and VCSEL Rapid modes support outdoor scan.
Avoid scanning in rainy or windy conditions. Moisture may damage the scanner or impair data accuracy due to wet object surfaces.
¶ 7.4 More Tips
For improved scanning results, you can review and configure suitable parameters prior to scanning. Parameter settings directly impact model completeness, definition, and post‑processing efficiency. Refer to Revo Scan 6 User Manual - Scanning Parameters Settings for guidance on detailed settings.
¶ 8. Model Processing and Advanced Functions
¶ 8.1 One-click Edit
¶ 8.2 Manual Processing
This mode offers greater flexibility and is suitable for users who have higher requirements for model quality. Available functions include: Point Cloud, Mesh, Texture, Alignment, and Key Frames Edit. You can click the links to view the details.
¶ 8.3 AI Object Segmentation and Tracking Function
Object Segmentation: Uses AI object recognition and tracking technology. After selecting the target object region, the software can continuously track that region during scanning, automatically remove irrelevant environmental point clouds, and output independent object point cloud data. For details, see Revo Scan 6 User Manual - Object Segmentation.
Remove Background: Uses AI background recognition and filtering technology. After selecting the background area to be removed, the software can continuously ignore that area during scanning and automatically retain the target object's point cloud. For details, see Revo Scan 6 User Manual - Remove Background.
¶ 8.4 3DGS Real Modeling Function
3DGS: Uses 3D Gaussian Splatting reconstruction. The system generates a Gaussian model based on point cloud and RGB scan data for improved surface detail fidelity. This feature can only be used after mesh reconstruction.
Revo Scan 6 User Manual - 3DGS
¶ 8.5 Mirroring
RANGE 3 (Pro) also supports wireless casting to a phone via Revo Mirror. Perform the following operations:
① Visit the Revopoint official website and go to "Support" > "Download" menu to download and install Revo Mirror for both desktop and mobile.
② Mount the Battery Grip onto the scanner. Connect the Battery Grip to the scanner with the Battery Grip Power Cable.
③ Ensure both the computer and phone are connected to the network named "RANGE_3-REVO-XXXXXXXX" or "RANGE_3_Pro-REVO-XXXXXXXX". Open Revo Scan 6, wait for the scanner to connect and enter the scanning page, then click the mirroring button.
④ Tap the detected device to be mirrored in the mobile Revo Mirror app.
⑤ Follow the prompt on the PC to enter the PIN code to complete the initial pairing. Then, click “Enter Screen Mirror Mode” to control the scanning process.
For more information about software and screen mirroring, please refer to Revo Mirror User Manual.
¶ 9. FAQ
Connection Issue Troubleshooting
¶ 10. Product Specifications
| Parameter |

|

|
|---|---|---|
| Scan Method | Handheld |
|
| Technology Principle | VCSEL Near-Infrared Structured Light |
VCSEL Near-Infrared Structured Light Infrared Multi-Line Laser |
| Object Type | Large, medium and small objects |
|
| Volumetric Accuracy① | VCSEL Rapid: 0.05 mm + 1 mm × L (m). L is the length of the object. |
Laser Line: 0.03 mm + 0.2 mm × L (m). L is the length of the object. VCSEL Rapid: 0.05 mm + 1 mm × L (m). L is the length of the object. |
| Minimum Point Distance | 0.1 mm |
|
| Working Distance | VCSEL Rapid: 200 - 1000 mm |
Laser Line: 200 - 600 mm VCSEL Rapid: 200 - 1000 mm |
| Capture Range (Minimum Distance) | 113 × 134 mm at 200 mm |
|
| Capture Range (Maximum Distance) | 687 × 672 mm at 1000 mm |
|
| Recommended Minimum Scan Size | 30 × 30 × 30 mm |
20 × 20 × 20 mm |
| Maximum Scan Size | 4 × 4 × 4 m |
|
| Scan Frame Rate | VCSEL Structured Light: 20 - 30 fps |
Multi-line Laser: 80 - 105 fps (NVIDIA GPU), 40 - 60 fps (CPU) VCSEL Structured Light: 20 - 30 fps |
| RGB Camera Resolution | 1.3 Megapixels |
|
| Color Scanning | Supported |
|
| Tracking Mode | Feature, Color, and Marker |
Feature, Color, Marker, and Global Marker |
| Outdoor Scan | Supported. Ambient Illuminance < 100,000 lux |
|
| Light Source ② | VCSEL Near-Infrared Structured Light |
11 Parallel Infrared Laser Beams VCSEL Near-Infrared Structured Light |
| Depth Camera Fill Light ③ | 2 |
|
| RGB Camera Fill Light ③ | 2 |
|
| On-chip Computing | Depth Data Calculation |
|
| Button | 4 |
|
| Minimum PC Requirements | macOS Processor: M1 Pro/Max/Ultra RAM: ≥ 16 GB Windows CPU: Intel i7 13th Gen or AMD Ryzen 7 5800 RAM: ≥ 16 GB GPU: NVIDIA GeForce RTX 3060 (8 GB) Note: ① If the CPU specification is unknown, make sure it has no less than 8 cores, 16 threads, and a base frequency of 2.4 GHz. ② GPU Acceleration: NVIDIA GPU, AMD GPU, and Apple Mac GPU are supported. |
|
| Recommended PC Requirements | macOS Processor: M3 Pro/Max/Ultra or later RAM: ≥ 24 GB Windows CPU: Intel i9 12th Gen or later RAM: ≥ 32 GB GPU: NVIDIA RTX 4060 (8 GB) or later |
|
| Mobile Requirements | ① Android CPU: Snapdragon 8 Gen1, Dimensity 9000, Kirin 9000S Equivalent performance or later RAM: ≥ 12 GB System Version: Android 11 or later Storage: ≥ 128 GB ② iPhone Model: Models after iPhone X ③ iPad Model: 10th Gen iPad or later |
|
| Compatible OS | Windows 10/11 (64-bit), Android, iOS, macOS 11.0 and later |
|
| Exported File Format | PLY, OBJ, STL, ASC, 3MF, GLTF, FBX, and Splat |
|
| 3D Print Compatible | ||
| Wi-Fi | 6 |
|
| Port Type | USB‑C 3.0 to USB‑C Cable (2 m) |
|
| Power Supply | DC 5V, 2A; Powered directly by PC |
|
| Scanner Weight | 218 g |
220 g |
| Dimensions (L × W × H) | 163 mm × 57 mm × 32 mm |
|
| Scanning of Special Objects | Use scanning spray when you scan transparent and reflective objects. |
|
| Scanner Calibration | Supported |
|
| Mobile Power | Optional 5500 mAh Battery Pole |
Standard 5500 mAh Battery Pole |
| Other Optional Accessories | Marker Block Kit |
|
| Note | 1. Volumetric accuracy is obtained under standard laboratory conditions using standard test methods. Results may vary in actual operating environments. 2. Both RANGE 3 and RANGE 3 Pro are classified as CLASS 1 LASER PRODUCTS. Avoid direct eye exposure to the light source at close range. Please refer to the Class 1 laser standard documentation for further details. 3. This product contains flashing lights and may not be suitable for users with photosensitive epilepsy. |
|